

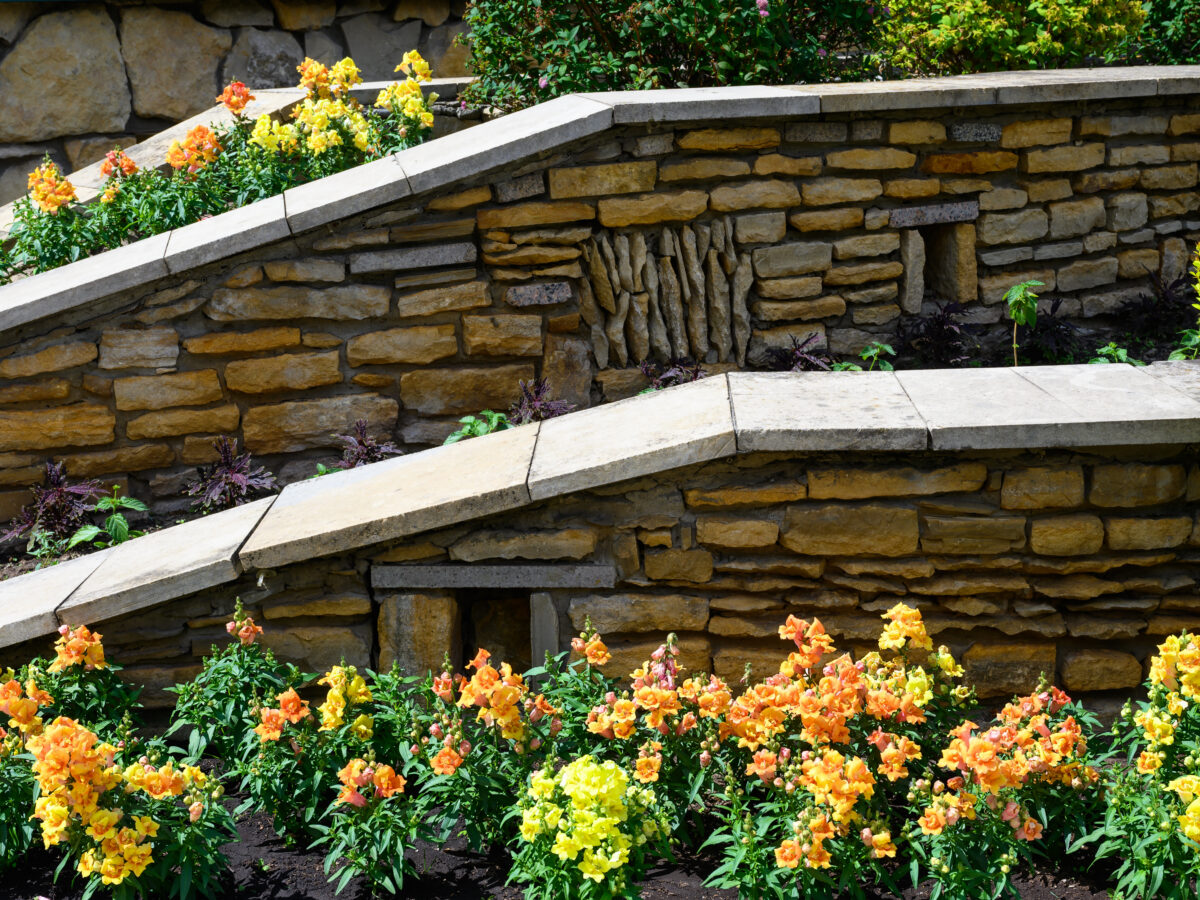
A sloped yard turns drip irrigation into a math problem nobody warned you about. Water finds the bottom of a hill whether you want it to or not, and on a system with a dozen emitters strung down a grade, that means the top of your bed quietly starves while the bottom drowns. I learned this the annoying way on a client’s terraced border: top tier bone dry, bottom tier practically a bog, same timer, same schedule. The fix isn’t more water. It’s the right parts in the right order, and a couple of layout habits that flat-ground drip never required.
Why slopes break ordinary drip irrigation
A pressure regulator at the spigot gives you a flat, even number, say 25 PSI, measured at the head of the system. But that number doesn’t hold steady once the tubing starts climbing or dropping. Water gains pressure as it flows downhill and loses it climbing up, roughly 0.43 PSI for every foot of elevation change. On a gentle 10-foot rise, that’s not much. On a 30-foot slope with a retaining wall or two, it’s enough to turn your top emitters into a trickle and your bottom emitters into a small flood.
The second problem is runoff. Flat ground lets water soak straight down. A slope lets it run sideways across the surface before it has time to soak in, especially on compacted or clay soil, so a chunk of what you apply never reaches the root zone at all.
The one part that fixes most of it: pressure-compensating emitters
Standard drip emitters are simple orifices: pressure goes up, flow goes up. Pressure-compensating (PC) emitters have a small internal diaphragm that flexes to hold output steady across a range of inlet pressure, commonly somewhere around 15 to 50 PSI depending on the model. Put PC emitters at the top and bottom of the same slope and, within that rated range, they both put out close to the same gallons per hour. That’s the single upgrade that matters most here, and it costs maybe a dollar or two more per emitter than the standard kind.
If you’re using dripline instead of point-source emitters, buy pressure-compensating dripline specifically. It’s sold that way, usually labeled “PC” in the product name, and it’s worth seeking out rather than grabbing whatever dripline is cheapest. The rest of the system, filter and tubing sizing, stays the same as any flat-ground build.
Laying out a system on a slope
Plan the mainline to run across the slope, on the contour, rather than straight up and down it. A line that runs along the contour keeps every point on it at close to the same elevation, so the pressure swings happen once, gradually, across the whole run instead of emitter-by-emitter down a steep drop. From that contour mainline, short feeder lines branch downhill to individual plants or short dripline rows, each one only climbing or dropping a few feet rather than the whole hillside.
| Slope situation | Recommended approach |
|---|---|
| Gentle grade (under roughly 10% slope) | Standard layout works with PC emitters as a safety margin; contour routing is optional |
| Moderate slope (roughly 10–25%) | Run mainline on the contour, PC emitters or PC dripline required, split into shorter zones |
| Steep slope or terraced beds (25%+) | Treat each terrace or tier as its own small zone with its own tap point; add check valves to stop low-head drainage refilling the bottom line after shutoff |
These are starting points, not fixed rules, since the right split depends on how long each run is and how much the grade actually changes. A quick way to estimate your slope: measure the rise in feet over a 100-foot horizontal run, then divide and multiply by 100 for a rough percentage. If you don’t have 100 feet to work with, scale it down, a 3-foot rise over 20 feet of run is also about 15%.
Zoning: keep runs short and tiers separate
The general layout guidance of keeping a mainline under roughly 200 feet per zone gets tighter on a slope. Elevation change eats into that budget faster than flat distance does, so a run that would be fine flat can start showing pressure problems at half that length once it’s climbing a hill. If your yard has terraces or a stepped retaining-wall design like the one in the photo above, the simplest approach is usually one small zone per tier, each with its own tap off a manifold at the top, rather than one long line snaking down through all of them.
This costs a bit more in fittings and valves up front. It also means a problem on one tier doesn’t starve the others, and you can run each tier’s schedule separately if the soil or sun exposure differs tier to tier, which it often does on a terraced slope.
Preventing low-head drainage
After you shut the system off, gravity keeps pulling water through the lines toward the bottom of the slope for a while, a phenomenon irrigation folks call low-head drainage. In mild cases it’s just a damp patch at the lowest emitter. In persistent cases it waterlogs the bottom of the bed over a season while the top stays appropriately dry. A check valve (sometimes built into PC emitters, sometimes a separate inline part) stops backflow and drainage once the system shuts off. If the bottom of your slope is consistently soggier than the rest despite otherwise even watering, this is usually the missing part, not a scheduling problem.
Installation notes specific to a hillside
- Stake tubing more frequently. Gravity and soil creep pull loose tubing downhill over a season; stake every 2 to 3 feet on a slope instead of the usual 3 to 4.
- Mulch heavier at the top of the slope. A thicker mulch layer at the high point slows surface runoff before it carries soil and fertilizer downhill, and it protects tubing from UV in a spot that tends to see more direct sun on a south-facing grade.
- Anchor the mainline at direction changes. Anywhere the contour line bends, a stake or two keeps the tubing from sliding and bunching after a season of freeze-thaw or heavy rain. Skip this and you’ll find a foot of slack pooled at the low corner after the first big storm, which is exactly what happened on that terraced border I mentioned above.
- Check for erosion channels before you bury anything. If the slope already shows rills or bare channels where water runs during storms, route tubing away from them; burying a line in an active erosion path just gets it washed out again.
FAQ
Do I need pressure-compensating emitters on every slope, even a gentle one?
Not strictly. On a mild grade, under roughly 5 to 10%, standard emitters usually stay close enough in output that the difference isn’t noticeable. Past that, PC emitters are cheap insurance, and most drip suppliers price them close enough to standard emitters that there’s little reason to skip them on any slope you’re not sure about.
Can I use a soaker hose on a slope instead of drip tubing?
You can, but soaker hoses have no pressure-compensating option, so the unevenness between the top and bottom of the run tends to be more pronounced than with PC drip emitters. They work best on short runs on a gentle grade; for anything steeper, point-source or dripline with PC emitters is the more reliable choice. The tradeoffs between the two systems generally are covered in soaker hose vs drip irrigation.
How do I know if low-head drainage is actually my problem?
Check the lowest point in the system an hour or two after the irrigation cycle ends. If it’s still visibly wetter than it was right when the cycle finished, water is still draining downhill through the lines after shutoff, and a check valve at the head or at the start of each tier’s feed line should solve it.
Does a sloped yard need more total watering time than flat ground?
Not more volume, just a different delivery pattern. Because runoff carries some water away before it soaks in, shorter, more frequent cycles tend to outperform one long soak on a slope, giving the soil time to absorb each dose before the next one starts. The baseline run-time logic is the same as flat ground otherwise; see how long to run drip irrigation for the starting numbers, then shorten each session and add a cycle.
A slope doesn’t rule out drip irrigation, it just changes which parts are optional. Pressure-compensating emitters, a contour-routed mainline, and a check valve at the low point solve nearly every problem a hillside throws at a drip system. Get the layout basics right first with drip irrigation system layout, and the installation walkthrough in how to install drip irrigation covers the rest of the build the same way it would on flat ground.